
Tips for Wiring a Subpanel

Updated: Jul. 19, 2023
When you run out of space in your service panel, a subpanel is the best solution. Use these tips from a master electrician to install one safely.
The main service panel in your house is where the power provided by the electric utility company (or generated by your solar panels or wind turbines) branches out to all the devices in your house.
You might need a subpanel if the main panel doesn’t have enough circuit breakers, or you need power at a remote location like a garage.
By a lucky coincidence, John Williamson, the retired chief electrical inspector for the Minnesota Department of Labor and Industry and a master electrician, was installing a subpanel for his son’s detached garage while I was writing this. I consulted with him and he even sent pictures. He had plenty of advice to offer homeowners considering the same project.
Right from the start, he noted that the National Electrical Code (NEC) officially refers to panels and subpanels as “panelboards.” For our purposes, we’ll go with the more popular “main panel” and “subpanel.”
Wiring a subpanel isn’t as daunting a task as it appears. But mistakes can happen, and they’re potentially dangerous. These tips can help you avoid problems.
On This Page
Get as Big a Panel as You Can Afford
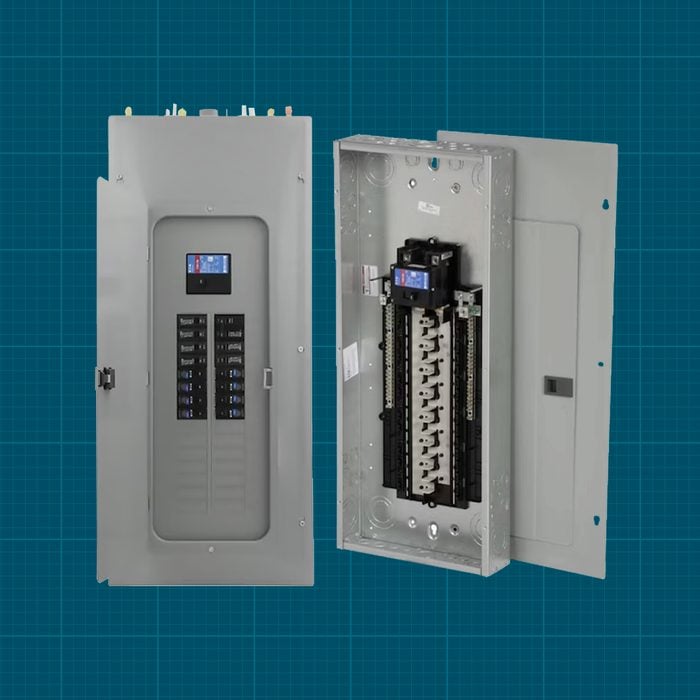
The subpanel feeder breaker in the main service panel serves as the disconnect for a subpanel in the same building, like a basement workshop. Consequently, you just need an MLO (main lug only) panel without a main breaker for your new basement workshop.
It doesn’t hurt to use a service panel with a factory-installed main breaker anyway. They’re more common and may be less expensive. You’ll need the main breaker when installing the subpanel on a detached building. Otherwise, it’s just handy to have.
“The panel manufacturers inadvertently create some confusion for DIYers,” says Williamson. “The home center might have a panel that has 20 circuits/10 spaces. Translation: It only has 10 spaces for full-size one-inch circuit breakers, but it will accommodate 10 tandem breakers, giving you 20 circuits.
“Guess what? AFCI, GFCI and two-pole breakers for 240-volt appliances and equipment often need full-size spaces. DIYers can run out of breaker spaces real quick. I always recommend buying the biggest panel you can afford, and bigger than what you think you need. You will never regret it.”
Choose the Right Location With Enough Working Space
A subpanel can be installed inside or outside, though you’ll need a weatherproof one outside. The National Electrical Manufacturers Association (NEMA) rates panels. Indoor panels are rated NEMA 1 for dry locations, and outdoor panels are rated NEMA 3R.
The NEC doesn’t allow panels to be installed in bathrooms, however. The reason, according to Williamson, is the corrosive effect of moist bathroom air. And because nothing can obstruct the panel, you can’t put it in a clothes closet near easily ignitable materials either. An unobstructed utility room or area is fine.
The NEC also specifies minimum working space distances. The minimum width is 30 inches or the width of the panel, whichever is greater. The depth, i.e. the distance between the front of the panel and any obstructions, needs to be at least 36 inches. The minimum height is 6-1/2-feet.
A good comparison for the clearance space, says Williamson, is the size of a standard refrigerator.
Do Not Bond Neutral to Ground
In the main service panel, the grounded neutral conductor and the equipment grounding conductors (EGCs) are bonded together. But they must not be bonded together in a subpanel. Doing so creates a shock and fire hazard throughout the electrical system.
Why? Because it allows normal neutral currents to circulate through the system on equipment grounding wires and through the grounded metal frames of appliances, light fixtures, equipment, etc. If normal neutral current flows through these grounded metal surfaces, a person could become the path for current and be subjected to a fatal shock.
When you install a main service panel as a subpanel, it’s important to remove the green bonding screw or the metal bonding strap. This ensures the ground and neutral pathways remain separated downstream from the building’s main service panel. Failing to do this is a common DIY mistake, and it’s a particularly dangerous one.
Use the Correct Size Subpanel Feeder Wire
The hot wires in the feeder cable that connect the subpanel to the service panel attach to the hot lugs in the subpanel. The other ends of these wires connect to a 240-volt, two-pole circuit breaker in the service panel.
The breaker rating determines the gauge of the subpanel feeder wire. According to Williamson, you can use either copper or aluminum feeder wire, in conduit or cable as may be applicable for the installation. Find the proper gauge in the following table:
Common Feeder Sizes
| (Amps) | Copper Wire (CU) | Aluminum Wire (AL) | Equipment Grounding Conductor (Copper) | Thinwall Conduit | PVC Conduit (Schedule 40) or (Schedule 80) | Liquidtight Flexible Metal Conduit |
|---|---|---|---|---|---|---|
| 30 | 10 AWG | 10 AWG | 10 AWG | 1/2 inch | 1/2 inch | 1/2 inch |
| 40 | 8 AWG | 8 AWG | 10 AWG | 3/4 inch | 3/4 inch | 3/4 inch |
| 50 | 8 AWG | 6 AWG | 10 AWG | 3/4 inch | 1 inch | 3/4 inch |
| 60 | 6 AWG | 4 AWG | 10 AWG | 1 inch | 1-1/4 inch | 1 inch |
| 90 | 4 AWG | 2 AWG | 8 AWG | 1-1/4 inch | 1-1/4 inch | 1-1/4 inch |
| 100 | 3 AWG | 1 AWG | 8 AWG | 1-1/4 inch | 1-1/2 inch | 1-1/4 inch |
Table notes:
-
Always check with your local electrical inspection department before proceeding.
-
For the purpose of this table, the terms wire and conductor are synonymous.
-
This table only includes a few of the common feeder combinations.
-
This table is based on a typical 240/120-volt feeder to a subpanel with two hot conductors, one neutral conductor and one equipment grounding conductor.
-
For some installations, Type SER Service Entrance Cable is a good option instead of conduit.
-
The wire insulation types used in this table are THHN, THWN and THWN-2.
-
Column 1: Maximum amperage rating of the circuit breaker and feeder.
-
Column 2: Minimum AWG size for copper (CU) conductors.
-
Column 3: Minimum AWG size for aluminum (AL) conductors.
-
Column 4: Minimum size copper equipment grounding conductor.
-
Column 5: Minimum size for Thinwall Conduit (EMT Electrical Metallic Tubing).
-
Column 6: Minimum size for PVC conduit (Rigid Polyvinyl Chloride).
-
Column 7: Minimum size for LFMC (Liquidtight Flexible Metal Conduit).
Originally Published: July 19, 2023